How to install and set up AWS CLI on macOS
Easy steps to install AWS CLI in macOS and connect to your AWS account.


What is AWS CLI, and why do I need it on my MacBook?
AWS CLI is a command-line tool that can help you to manage your AWS account from your laptop’s terminal rather than spending time loading the AWS web console in your browser.
Honestly, it is also a fun and easy way to manage and create resources in your AWS account.
Pre-requisite
Create an AWS account using your email address.
This link will guide you to set up your first AWS account.
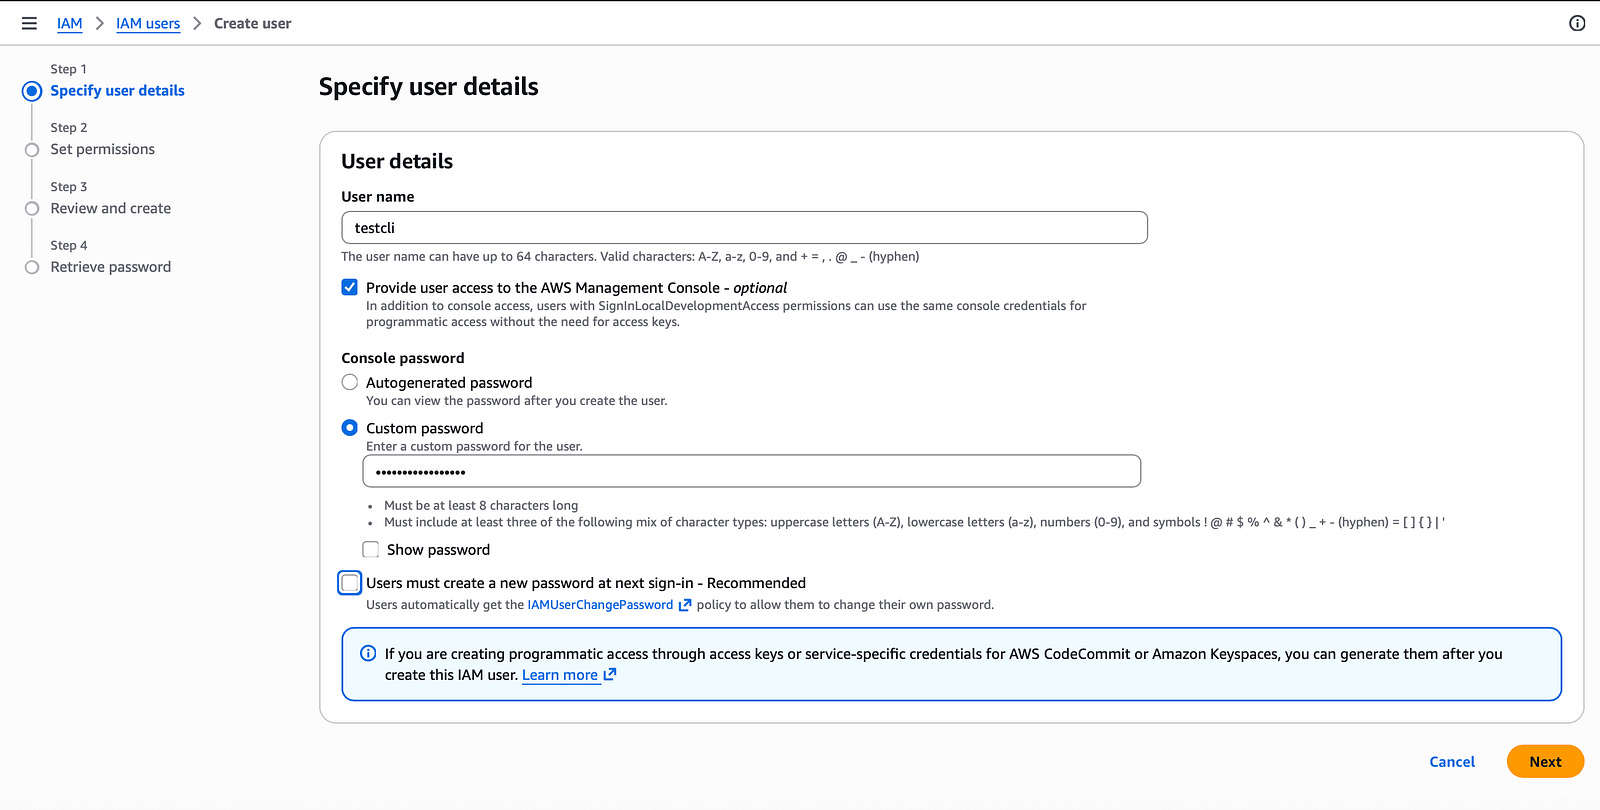
Create an AWS IAM user. (optional)
If you haven’t created a separate user, then this article will guide you to create your first AWS IAM user. Creating your resources in your root account is not recommended, and hence, we are creating and using a separate IAM user for your exercises.
Now, let’s start installing AWS CLI on our MacBook and set it up to connect to our AWS account.
Option A: Install using the GUI method
Download the AWS CLI from the official download website link.
Double-click the downloaded file and follow the on-screen instructions (mostly next, next, next …) to install the AWS CLI.
Option B: Install using Homebrew
Homebrew is a package manager for macOS, and installing AWS CLI using Homebrew is a breeze. You just have to run the below command in your macOS terminal, and wola, AWS CLI is installed.
brew install awscliThis automatically handles the dependencies and adds the tool to your path.
For those who are looking to install Homebrew, refer to this link.
As we have installed AWS CLI on our machine, let us now set it up to connect to our AWS account.
Generate access keys
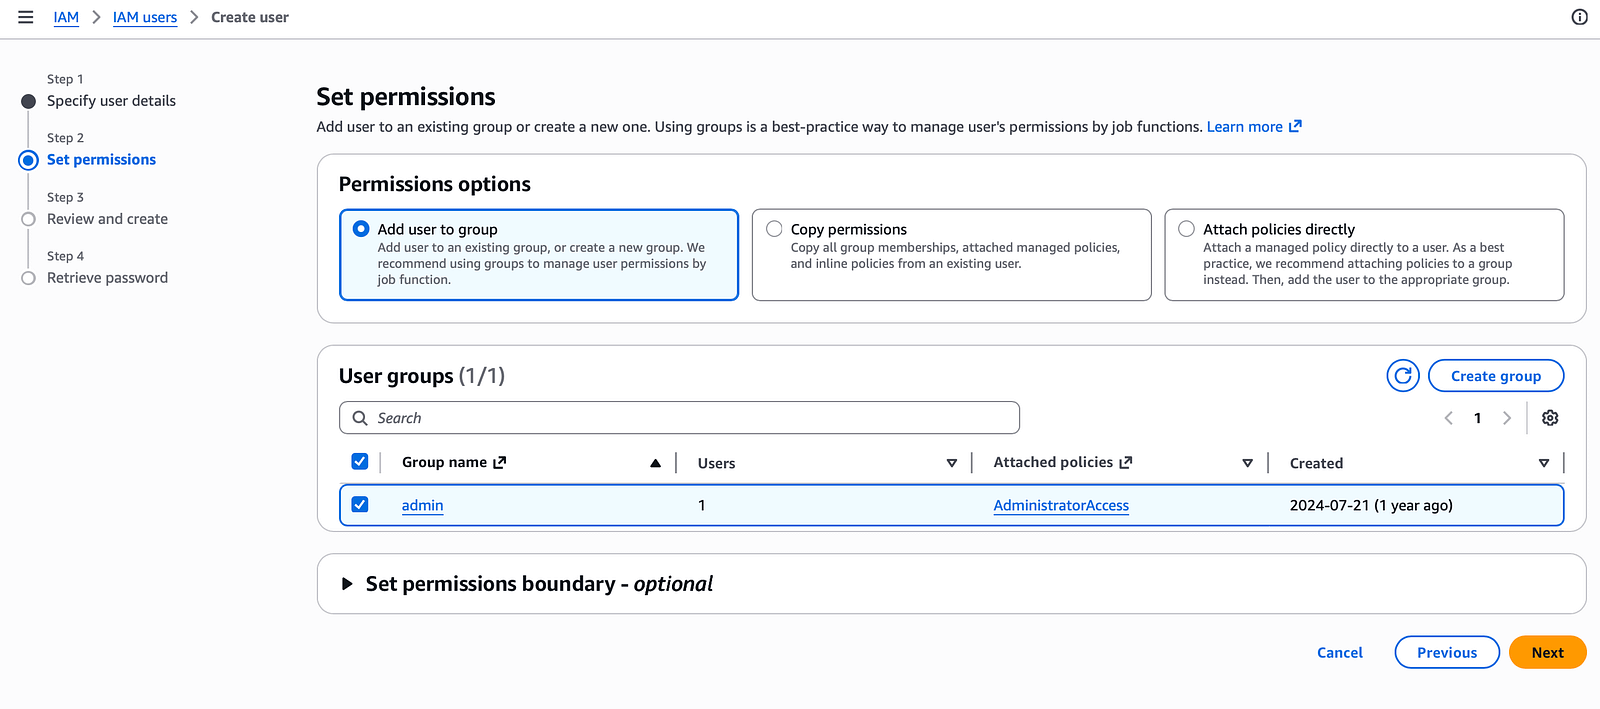
Sign in to the AWS console, select a user with whom you want to connect to AWS using AWS CLI or create a new user with AdministratorAccess.
Go to the User list, select your user and create an access key.
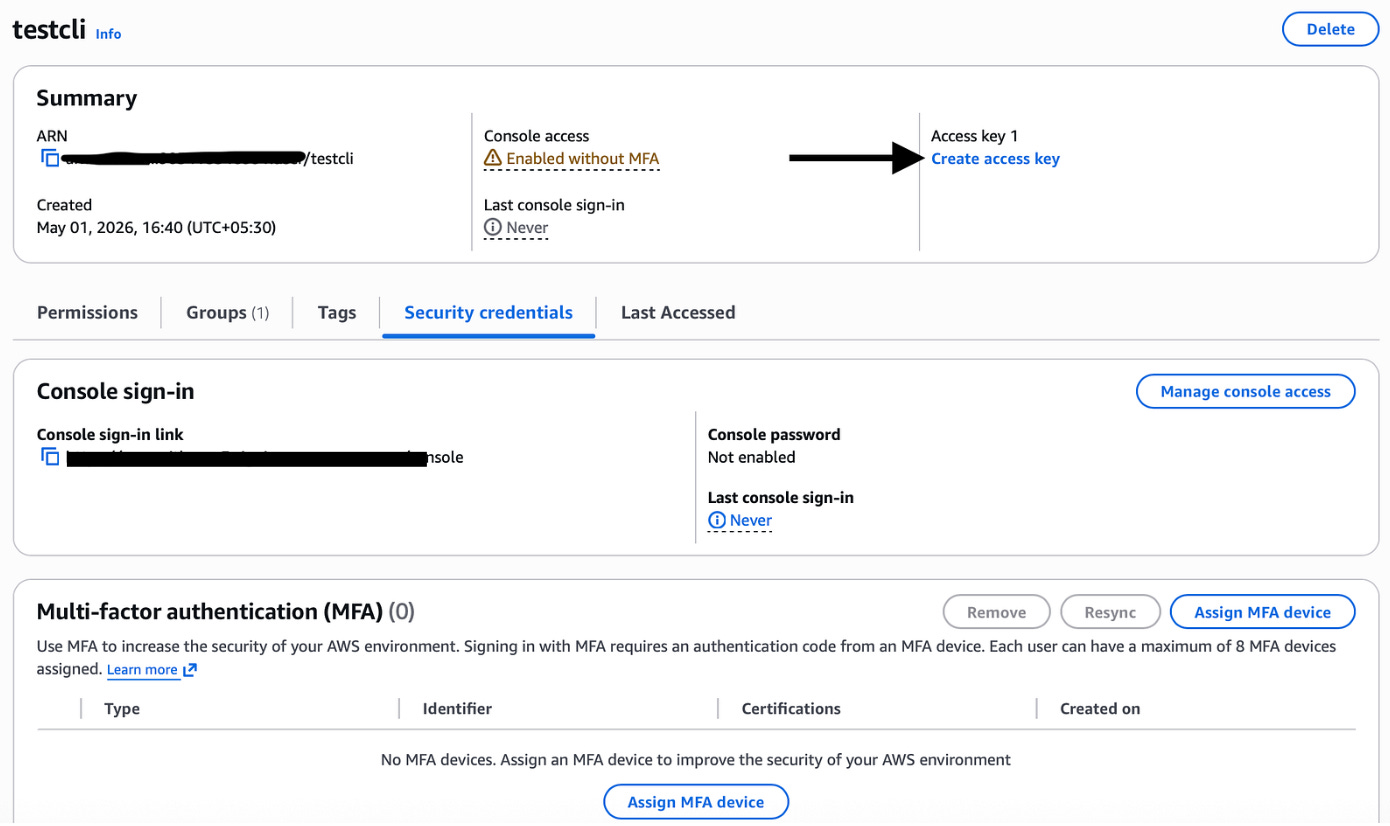

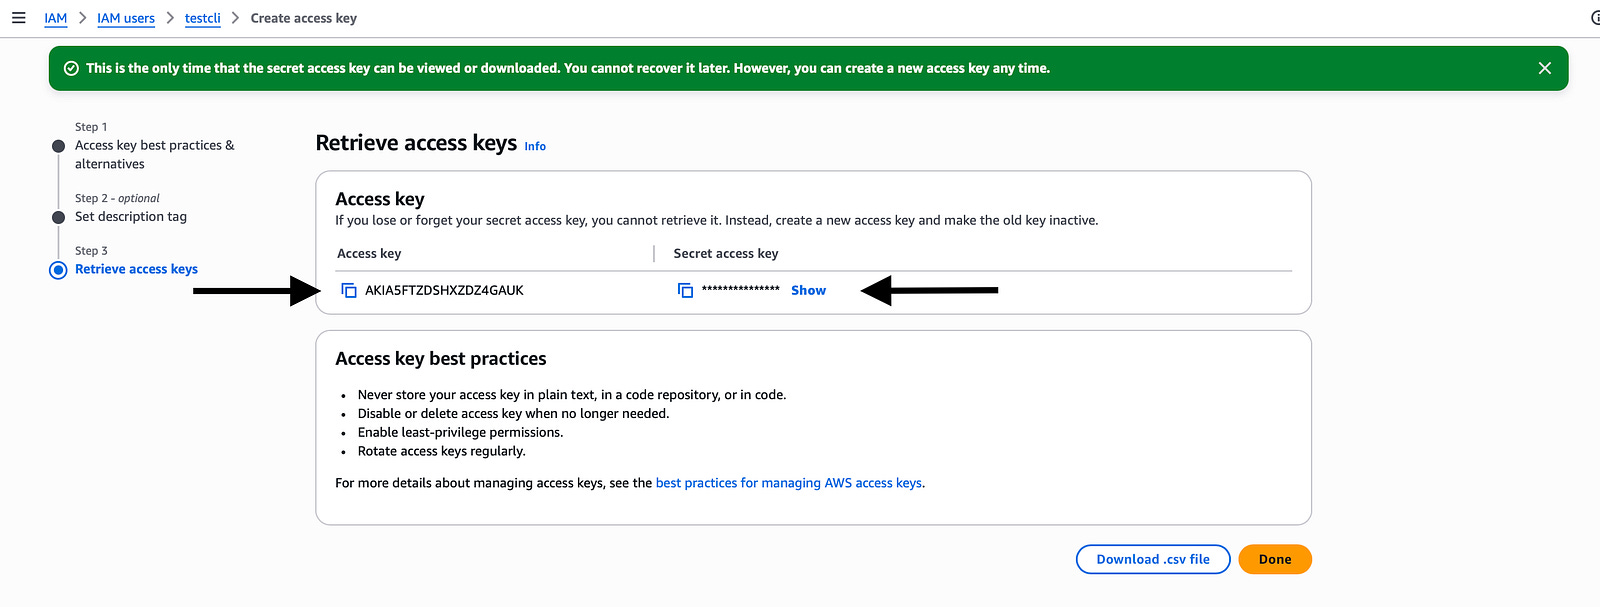
You may have to make sure to note down the access key and security key, as we will need them to configure AWS CLI. You can also download the CSV file from the above screen to get the key values in a CSV file.
If we miss the access key, we might have to add a new access key, but AWS only allows us to create 2 access keys for a user. Hence, be careful not to lose them.
Configure CLI
Now lets configure AWS CLI on your MacBook. Keep ready with your AWS access key ID, secret access key, default region name and default output format(JSON).
Run the command below from your MacBook terminal.
aws configure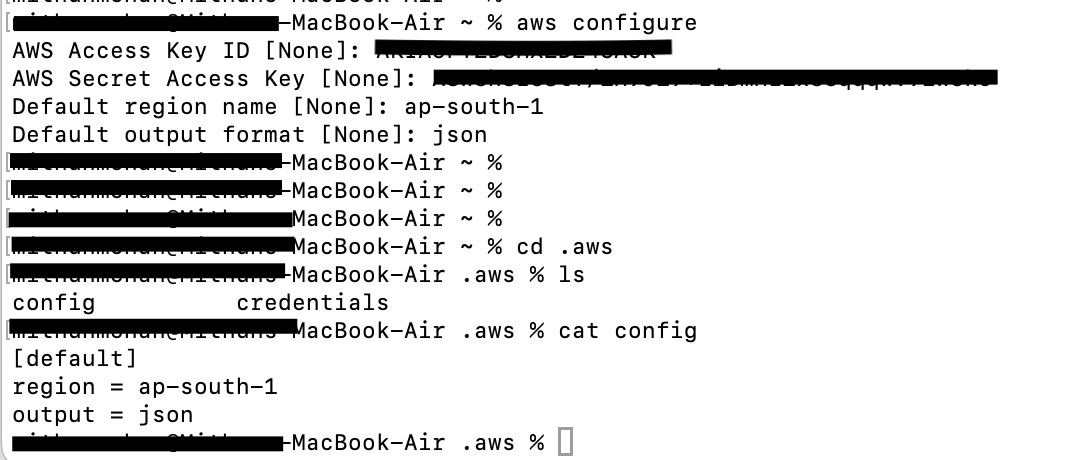
Here you can see a directory “.aws” under your home directory, and inside which we have our config and credentials files. The config file contains the region details, and the credentials file contains the keys we have provided.
Now AWS CLI will use this configuration to connect to our AWS console.
Test the connection
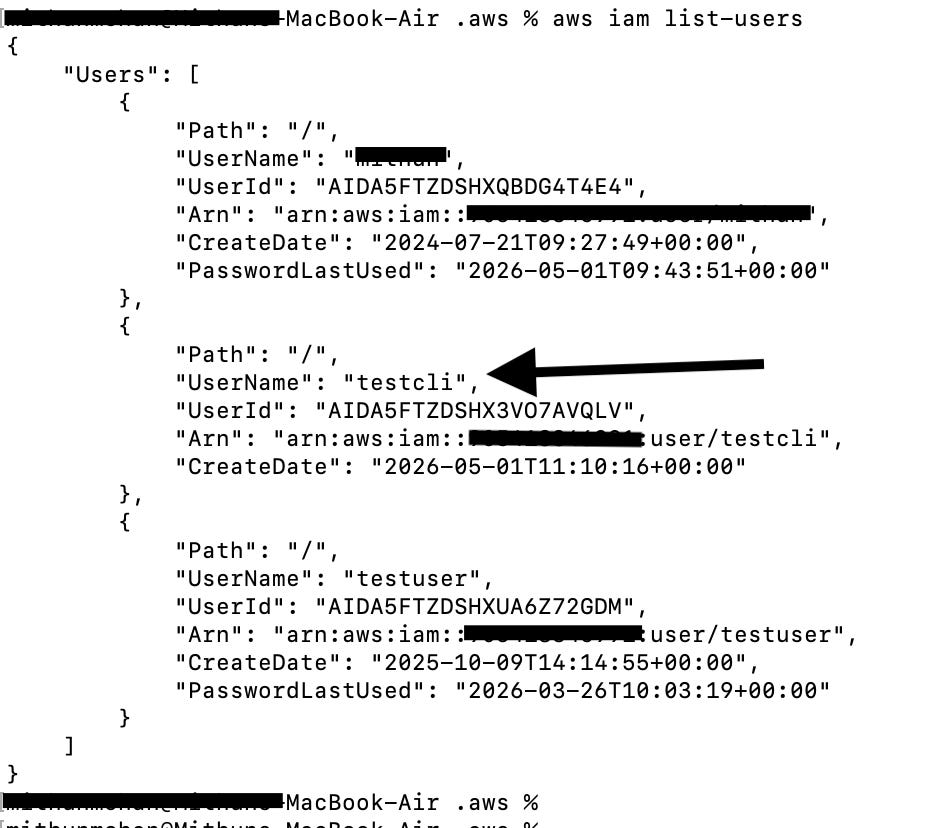
Let’s test the connection from our terminal using an AWC CLI command.
aws iam list-usersThis will list all the users we have created in our AWS console in a JSON format.
You can use the aws help command to see different resources, and to get the manual page for a specific resource, you can use aws <resource> help.
aws help
aws s3 help
aws <resource_name> help
Conclusion
Now that we have our AWS CLI ready on our machine, we can play around by implementing some of the AWS resources. Brace your seats, we will be having upcoming articles that help you start building your own projects using AWS CLI, Terraform and other cloud tools.
Thanks for reading!